Last Chance Walleyes

Ice186-9423.jpg

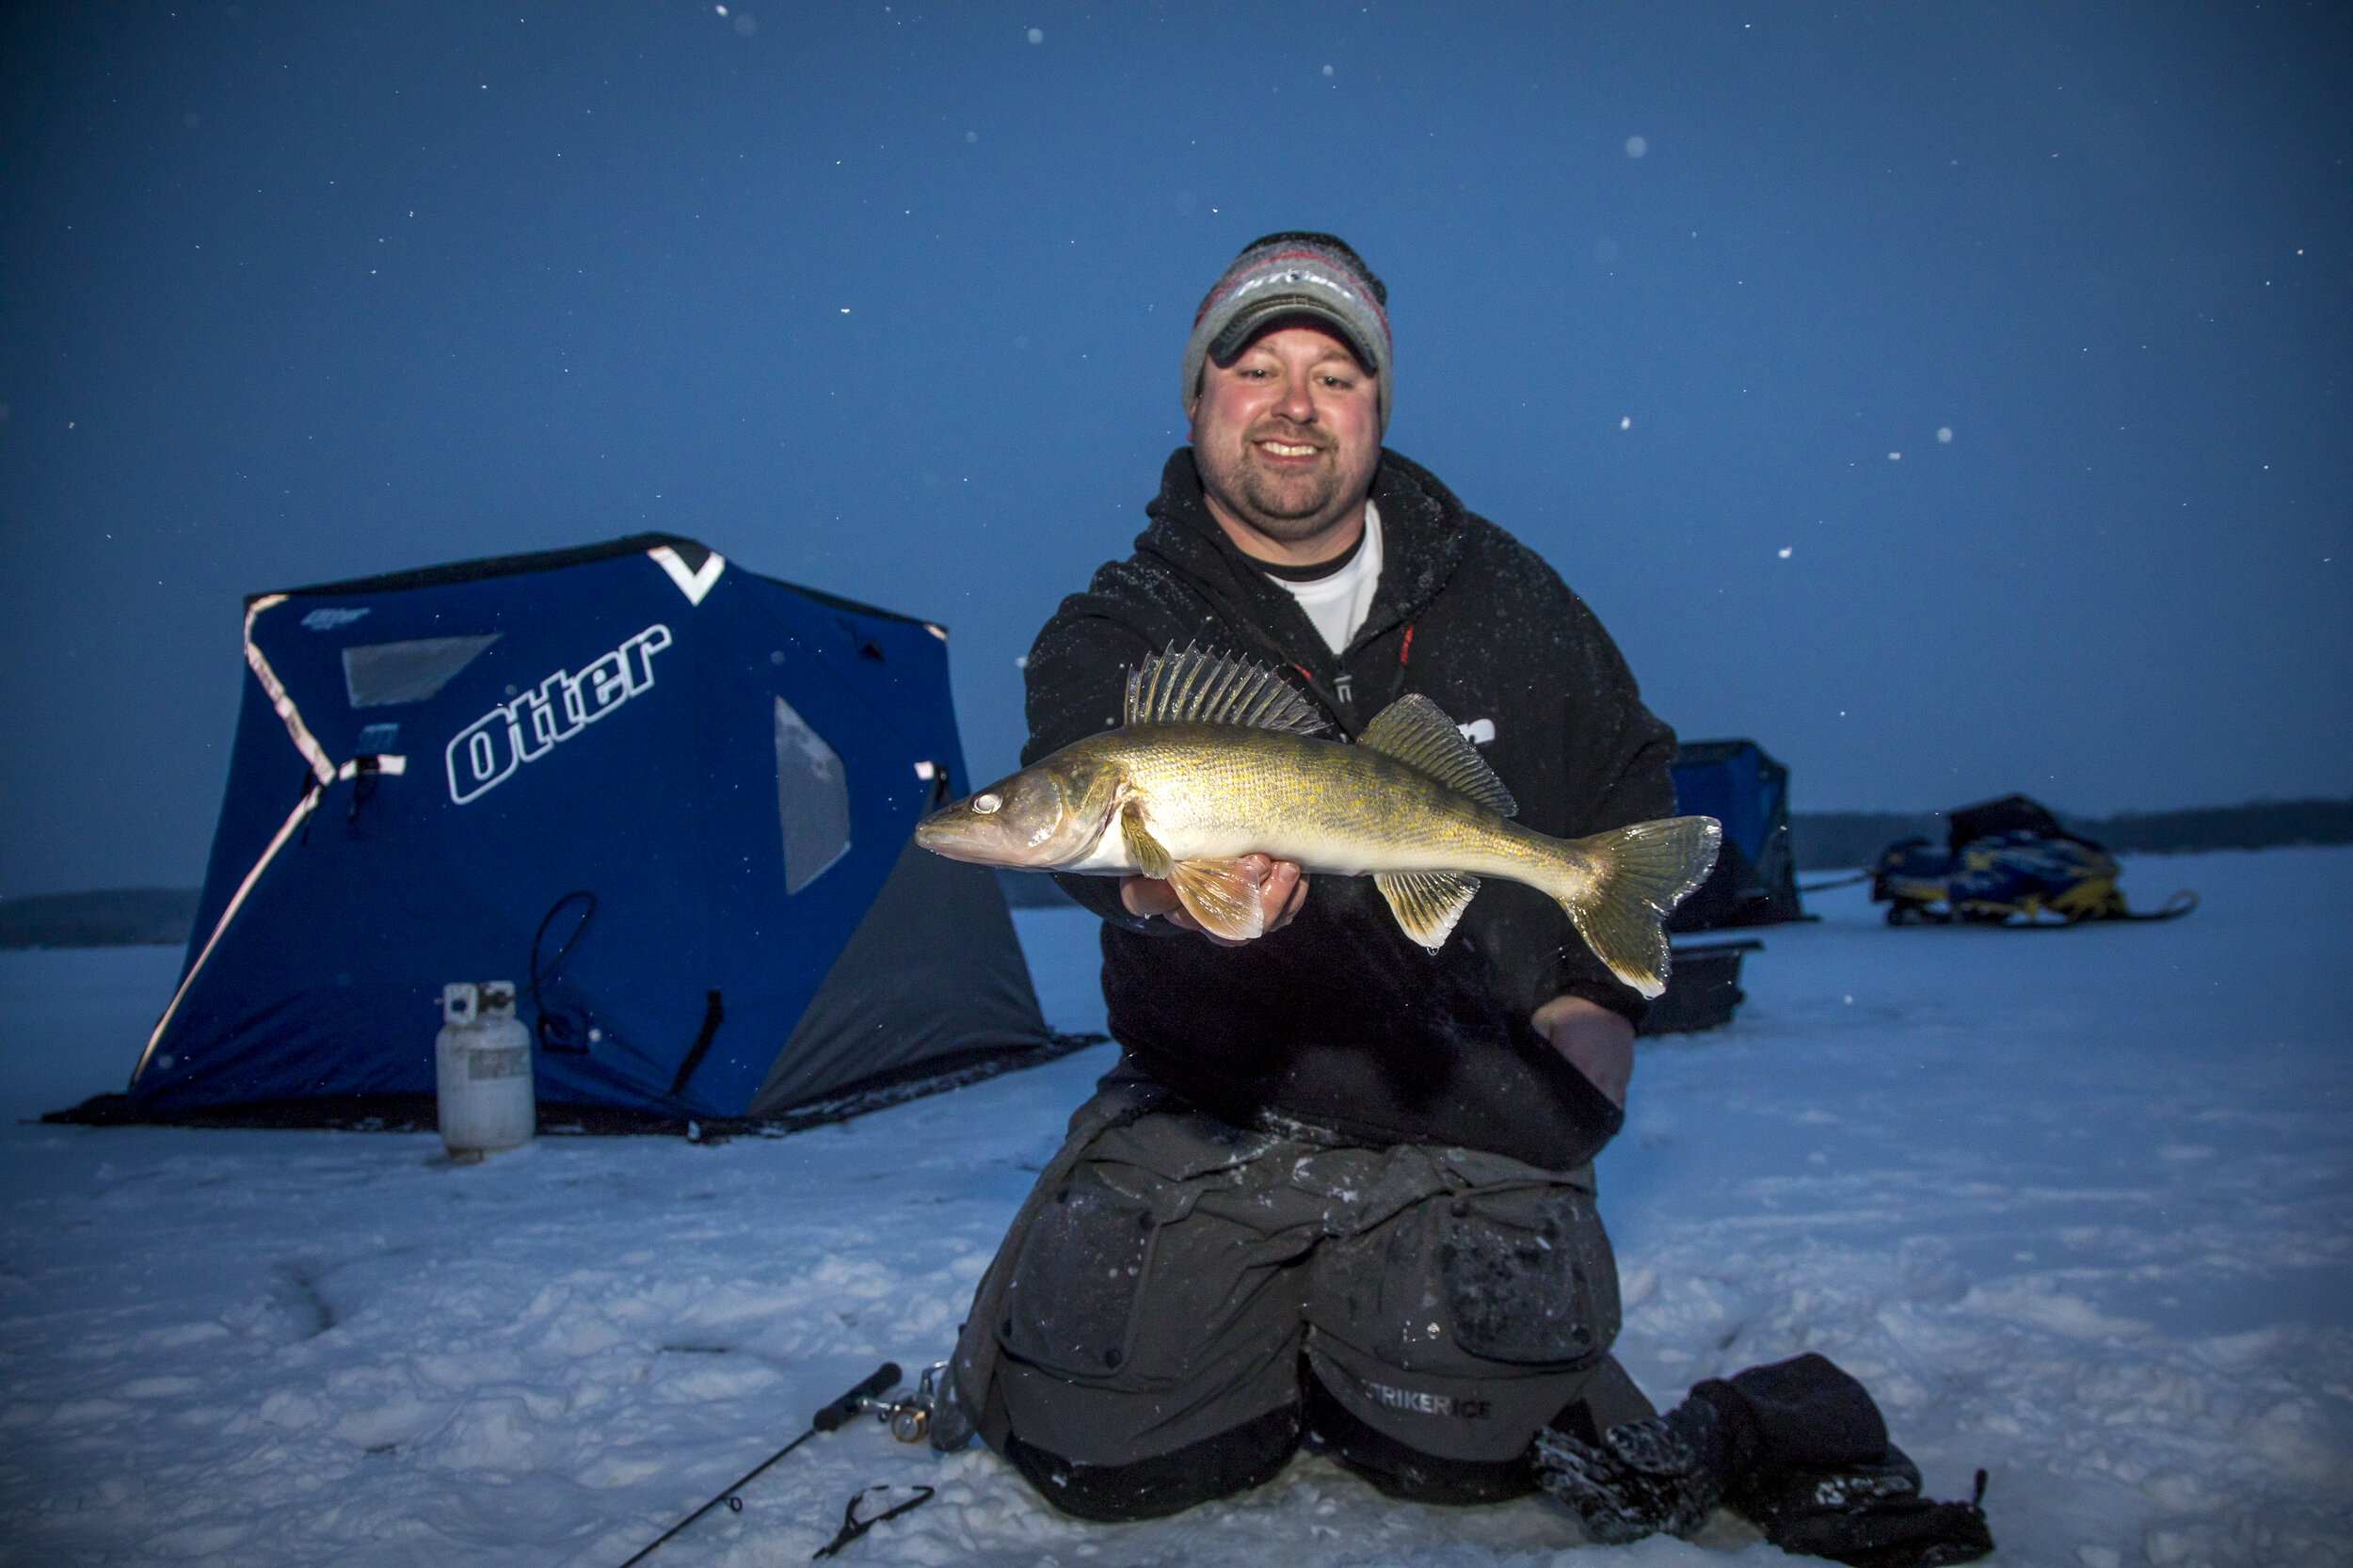
We’re nearing the end of walleye season in MN, and things have gotten a bit tougher.  Snow is deep and ice is thick(er), and the amount of available light at depth has been cut dramatically.  Your early season haunts are likely nowhere near you’re fishing now, and at this point, it’s more about just getting bites rather than talking about how many you’re catching.  Every year the fishing, predictably, slows down in February, but savvy anglers are still making the most of what season is left.  Minutia and detail are key as we approach the end of walleye season, and here are a few details that year in, year out, have always helped me put more fish topside.

Jigging Presentations – Aggressive jigging may still work in low light periods, or during pre-frontal conditions, but more often than not, this time of year sees fish investigating the racket without actually committing to it.  That still means it’s worthwhile, especially rattle baits or other heavy vibration lures, to call fish more than catch them.  This is especially effective if one person “rings the dinner bell,” such that other anglers and set-lines may be rewarded with fish general being called into the area.

Color starts to matter more during this time of year, as fish get choosier.  That means you might want to experiment with different hues during different light conditions.  For example, high sun and clear skies may see favor for blue/chrome, gold, or other metallic colors, while clouds and low-light may see preference towards glow and UV brightened baits.

More important than color however is bait selection, with more deliberate lure classes, fished less aggressively catching most of your jig fish.  Lift and pause, more than twitch incessantly.  Focus on short drops and spoon baits to do most of the jigging work during this time of year.  Plain jane is more exciting than fancy and frills.  Truly, less can be more here.

Dead-Sets – Whether we’re talking rattle reels, deadsticks, bobbers, or a combination thereof, you need to be employing the use of some stationary systems with free swimming live bait.  This can constitute the majority of your spread, though some active jigging is always welcome to draw fish in.  From here, you want to fine-tune your approach.  Dacron and big bobbers was fine early in the season.  Use instead smaller marker bobbers on rattle reel setups, that displace little water, and offer little resistance to a fish eating your minnow.  Now, you should be running a long fluoro-carbon leader to the hook end, making sure that your presentation looks as natural as possible.

Speaking of hook-end, consider your dead sets like a trolling spread.  Vary your look to fish by offering a variety of hook choices and let them play favorites.  You should start with a small wire hook with no color, up to colored variations, glow resin trebles, and then actual jigs to hook your minnows.  Often, on the toughest days, the smallest hooks and most natural presentations win, which is something you’ll never know if you have 4 set lines down, each with the same jig as the rest.

Tend your set with electronics when possible.  Too often, in a hard-house I see un-monitored lines down everywhere.  Eventually, people disregard them, only to find out a large sucker swam and tangled with the next-door line, a walleye actually picked another minnow clean, and the last set has a dead minnow on it.  Careful watch with electronics, even on your dead sets, will tell you how popular your offering really is.  When something is being approached constantly, yet not eaten, it’s high time to make a change.

Minnow IQ – Not all minnows are created equal in the opinion of most marble-eyes.  Fish that I’ve been on this year have shown a strong preference for smaller than normal suckers, and more importantly shiners.  They’re the minnow we love to hate.  Look at them wrong, and they’ll go dying on you, but employ them correctly and they can save a trip.  Again, consider putting your eggs in multiple baskets here.  Get a mix of fatheads to tip spoons, shiners and suckers for dead-sets, and even rainbows to mix things up where available.  The goal is to let fish in an individual system, be individuals.  Never argue with what the fish want, as they tend to win.

Other Details – Location can be really important at the end of the season, as fish can move less to feed, meaning you’re really on them, or really not.  Small moves on a piece of structure can mean everything, as a house that’s positioned 15-20 feet away from a transition or other hotspot means its too far away for lethargic late season eyes to head over and eat.  That also spurs a discussion on finding.  Make sure to keep looking for fish, even if you’re on a proven location.  Hub houses and other portables are invaluable scout-shacks, even if you’ve got a great permanent house to fish from.  Quite often, these scout shacks can offer valuable intel on timing of the bite, shallower vs. deeper, and what general preferences fish may have in a certain area. 

In addition, cameras are great tools for a host of fishing situations, but pull them up during this part of the year when stationary.  Especially in clear water, walleyes can shy to underwater cameras and actually affect the bite of your deadsticks and jigging presentations.  For lots of hard-house anglers, this may be difficult to do, but it may just increase your catch rate.

Lastly, pay attention.  It’s tough to catch fish as the modern conveniences and enjoyments of most portables and wheelhouses draw our interest away from the actual fishing.  I see it in new groups of anglers, kids, and avid anglers alike; the more focused a person is on catching fish, the more fish he or she will catch.  If you’re only tuned-in when someone else is catching, you’ve likely already missed your opportunity.  That can be a big deal when you may only get a 15-minute window of action morning or night.  Make the most of the experience by staying engaged, and you’ll already be doing better than most anglers on ice.

Underwater Viewing - The Camera 1 - 2 Punch

Cameras are a key part of Tony Roach’s strategy for jumbo perch.

Cameras are a key part of Tony Roach’s strategy for jumbo perch.

We’ve lived in a world with underwater cameras for several years now, and though technology has raced forward, the basic video feed of a swimming fish can captivate and inform nearly any angler.  As cameras have become lighter, smaller, and more crisp, new advancements in sonar, live-imaging, and side-scanning have entered the fray as well.  All of which makes for some tough decisions when budgeting for how best we can fool a fish.

Tony Roach is no stranger to that game, as he fishes across northern Minnesota each winter, doing his best to put clients continuously on panfish, perch, and walleyes.  It should come as no surprise then that underwater cameras are a key part of his strategy, and have been since their inception.  His camera approach mimics his now-famous “ice-trolling” concept of roaming select structural elements while drilling holes continuously, in an effort to both locate fish and stay on them.  Few have drilled as many holes in the ice as Tony, and fewer yet have followed that up with as much underwater viewing as he has either. 

The upshot is a 1-2 punch of underwater viewing that focuses on two main parts; the finding, and then catching, each of which utilizes different strong-suits of cameras vs. traditional sonar or even newer live-imaging devices. 

Finding

Perhaps the most crucial portion is finding them, and cameras accomplish that goal in a variety of ways.  The most obvious one, seeing a fish, shouldn’t be understated, as other means of finding fish rarely reveal speciation.  Many an angler has chased suckers while thinking a walleye was the belly-to-bottom target they saw on the graph.  Tony says, “We take out the camera when something isn’t adding up on sonar, and also just when we’re searching down a break.” 

Certain species like perch, are curious and actually drawn to the camera.  “We’re looking for the better jumbos, and even though the graph can be full, we drop cameras to stay on big fish,” says Roach.  He recalls a recent trip to Winnie where perch were everywhere, but better fish were tough to stay on.  Tony says, “There was a blizzard of perch down there, and we talked to other anglers that didn’t do well because they couldn’t tell the difference from small perch to good ones on their graph.  We just drilled until the camera revealed more jumbos.” 

Tony uses a camera for other scouting purposes too, especially for panfish.  “Standing green cabbage will always be great places to look for gills, but it’s hard to determine cabbage from other less desirable lake weeds without a camera,” says Roach.  These can be shallower locations too, where the sonar cone angle means a relatively small footprint on the lake bottom.  Translated, that means cameras can cover more area, especially when the water is clear.  “You can pick up on the structure and condition of the weeds too,” continues Roach, noting that pockets, points, and inside turns in a healthy weedbed are hard to detect in any other way.

Tools of choice for the finding game include lightweight, pocket-sized screens with equally small ducers.  “It’s just easier to jump hole to hole with these models vs. the larger lunch-box style versions,” says Tony.  I’d agree, in saying that the best underwater camera is one you’ll use.  Smaller versions are easier to deploy, so even if the screens aren’t huge, you’re much more likely to use them when searching for schools of fish across larger areas. 

Catching

Of course, catching more fish is the primary reason anyone buys an underwater cameras to begin with, but there’s a pile of ways you can extend that idea.  At face value, simply seeing a fish inhale your bait gives you a distinct advantage, but this is especially true on tough bites.  I recall a bite on Devil’s Lake where perch were thick, but would only eat when a live minnow was set on bottom, made to struggle against the weight of the jig that secured him.  Perch would nose down, stare, and eventually pin the minnow to bottom, leaving the angler without a camera non-the-wiser to any perch’s presence. 

Tony notes similar experiences with perch, “They’re the fish you love to hate – they can rise to a bait so quickly, like they’re going to crush it, and yet sometimes you can barely see or feel the bite.”  Whether targeting finicky perch or other species, Roach is quick to admit that cameras make him a better angler.  “Just having one down allows me to study how the fish are biting, and that can change from one hour to the next, or one area to another,” says Tony.  “Sometimes we ‘sort’ by only allowing larger fish to eat the jig, and other times we’re using the camera to see what jigging technique will trigger them, it’s an invaluable tool.”

Edits020-0051.jpg

I’ve also noticed how well an underwater camera can train your jigging stroke.  I heard Clam-Pro and guide Jason Durham speak about unnatural jigging motions by saying, “you’d look at a hamburger suspiciously if it suddenly jumped to the ceiling too.”  I think underwater viewing can certainly prevent and inform that, as any new lure I test comes under close visual scrutiny with the camera.  It’s helped unlock key twitches, stops, and swings to popular lures that have always done well for me, making them even better when a fish comes into frame.

Here’s where you can look towards a larger screen camera model, whether lure-training or trying to trick a bluegill.  Camera screen size is really the premium when it comes to stationary viewing, and new HD models are great for the wheelhouse too.  For select units, HDMI cables can transfer a true-HD signal to TV units in the house, such that picture quality is preserved instead of stretched and blown out when taking it to the big screen.  All of which could be argued is more entertainment than educational, but we’ve all grown tired of pixelated views of either photos or video, such that what you get from the experience can be limited.        

Whatever your model of choice, I don’t see underwater cameras going away anytime soon.  They provide the most cost effective way to get a fish’s-eye view of the underwater world, and capitalize on images that only the human eye can interpret.  Learn to use them for both finding AND catching, and you’ll soon consider them just as important as your flasher. 

Choosing the Right Ice Fishing Sled

What are you pulling? Different designs serve different purposes on ice.Pictured - The Otter Sport Sled - a perfect hand-tow model.

What are you pulling? Different designs serve different purposes on ice.

Pictured - The Otter Sport Sled - a perfect hand-tow model.

Ever thought about the best sled for hauling your gear onto the ice?  If you’re like most people, it’s not a strong consideration, at least until it’s spills over at the launch, runs into the back of your ATV, or weighs you down when pulling it through snow.  It’s a gear category that most of us really take for granted, even after disaster strikes, as most of us tend to make due with whatever we have.  Like many things, I’ve learned the hard way that not all sleds are created equal, and depending on how you’ll be using it, some features lend themselves to success better than others.

The Cheapie

I’ve towed ice gear in everything from red plastic kids sleds to drywall mud mixing utility tubs.  The chief upside is price and availability.  Chances are, you’ve got one laying around, and if you’re pulling by hand over fairly even terrain and little snow, it may serve your purposes just fine.  Downsides are plenty however, from the way they pull over deep snow (plowing through or floating unevenly across the top), to how well they secure your gear inside.  No slopes, no high speeds or with machines, and no expensive gear should be some basic rules of the road with these sleds.  They’re the first to disintegrate, quickest to frustrate, and fastest to end up back in the garage from my experience.  If you ice fish or winter recreate even only a few times per season, you can probably do better.

The Hand Tow

In terms of price, you’re looking at a sled that’s mid-range.  They tend to be large, but not overly so, as the poly rope that’s typically attached is meant to be hand-pulled in a variety of conditions.  The sled is heavier duty, but again, not to the point of feeling overweight, as the main goal of these sleds is for foot traffic and transport.  You want higher sides if possible, along with a good lip at the edge all around, such that you can use bungee straps or other means to secure a load over the rough stuff. 

I’m in the camp that everyone should own at least one of these kinds of sleds, for a variety of reasons, including the off-season.  These sleds are almost always under 100 bucks, and can haul over dry land and snow just the same.  The angle of attack on the front of them allows for better towing in deep snow, and good grooves running the length of them help it to track straight behind you as well.  They’ll float a deer across a small river, and haul landscaping plants around the yard.   

You may wish to upgrade the rope to something that feels a bit better to bare hands, and also make it longer.  Easier yet, a strap system that secures around your waist, paired with that longer lead makes pulling a breeze over longer distances.  There’s a million uses, but these improvements apply pretty well to most applications.

The Machine Tow

If you haul gear around the ice by snowmobile or ATV, the sled you need is entirely different than the first two mentioned.  Higher speeds, more torque and tension, along with the temptation to tow heavier items requires something made specifically for the job.  For that reason, roto-molded is the only way to go.  It’ll cost you more money, but the investment ensures even thickness of the sled throughout, especially in corners, angles, and pockets where it counts.  Most other sleds are thinner and weaker in these locations.  The manufacturing procedure adds some weight, but when behind a machine, you won’t notice it, yet have the durability advantage for your efforts.

Next you need to think about how you’ll be attaching the sled to your machine of choice.  Again, my opinion is fairly strong in saying you need a rigid hitch system.  Long ropes are great until you stop suddenly or are on glare ice, in which case your gear quickly becomes a projectile that slams into the back of your machine, or catches and edge and flips over.  Rigid steel bar hitch systems completely prevent that and are the premium option for towing.  Make sure you’re using an appropriately sized pin and key that adequately secures said hitch to the machine, as looking for pins in the snow is the worst.

Equally important is how the hitch system attaches to the sled.  Bolt through options, though common, put too much pressure on small areas of the sled, often resulting in failure.  A better design is the hitch-pocket system, molded into the sled, that utilizes a pin pushed through the sled, hitch, then sled again.  Pressure is distributed evenly throughout the front of the sled, rather than at two individual points, making it far more durable and trustworthy. 

From here, you can consider hyfax runners that wear out before the bottom of your sled will.  If you go over gravel, concrete, or any rough patches with regularity, these pay for themselves in time.  So too do travel covers that secure the load inside of the sled, keeping it relatively snow free and dry while you pull.  If you’re not worried about it floating, I drill a single small hole in each of the small longitudinal wells in the sled at the back end.  This allows any water that was trapped inside to escape in my garage by simply propping up the front of the sled slightly. 

Choose a purpose-driven sled this winter, and enjoy the benefits no matter how you fish or recreate.  Especially if you’ve purchased some nicer ice gear over the years, consider it an investment in the whole setup. 

Trash On Ice - Time to Clean Up our Act

Photo courtesy MN DNR.

Photo courtesy MN DNR.

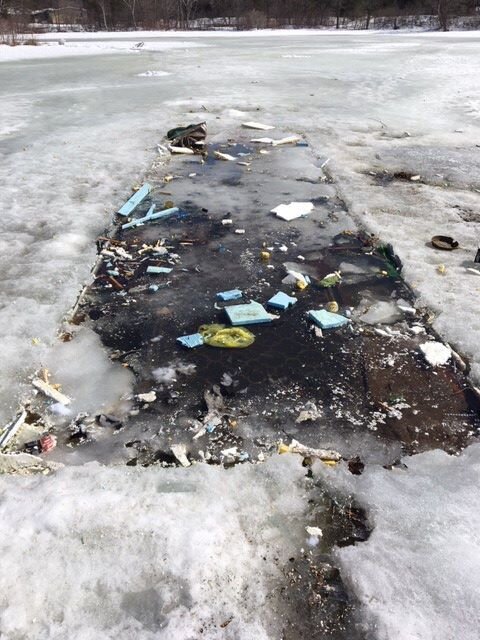
At the end of last ice season, I read a disturbing first-hand account of a lakeshore owner who spent a few days picking up trash on her hometown lakes.  She was careful not to accuse any group or point fingers, and simply stated everything she had found immediately after the ice receded in South Central Minnesota.  It mimics what I’ve seen in the springtime as well, from beachheads of washed up 1lb propane cylinders, to dead fish and worse, she didn’t reveal many surprises to anyone who’s walked around open water immediately following ice season. 

Most of the items she found had some relation to alcohol or tobacco products, from empty beer cans or bottles, to cigarette butts, packs, and wrappers.  Again, it’s not an affront to those who legally enjoy their use, but it is a direct assault on anglers who Illegally discard them.  Littering carries a fine, but unfortunately is rarely ticketed, which is why self-policing among us anglers should be common practice.

The next most common thing she found was anything and everything related to human excrement.  While it’s neither fun to write about or read, we all know it’s a fact of life, so why is it rare that we would prepare for such an event?  Actual feces, toilet paper, paper towels littered shorelines, as did many plastic bags filled with poop.  Anyone with animals or pets would know that we’ve been acting like one by doing our business and not cleaning up after ourselves.

Also common were fish-house related items, as if more smoking guns were required to make the case.  Lots of blocking material and fish house materials such as foam, roofing, hole cut-outs, plastic, and furniture pieces were among the mess discovered.  Random trash items from candy-bar wrappers, receipts, tackle packaging, plastic utensils, and minnow buckets were also top items found on several lakeshores.  There was even an old football, plenty of beef jerky, and soiled underwear washed ashore at the end of March on several of these lakes. 

She went on to express how heartbreaking it was to see the same people who enjoy these resources be the ones that polluted them.  While describing how these were the same waters she learned to fish on, she talked about how fish and wildlife suffer in such a scenario.  Kudos to her for doing something about it, and I think it’s high-time we each start doing something about it also.  Knowing that this is the beginning of the season, and litter patrol starts now, not later, here’s a few things I think we can all do a better job at.

Leading by Example – Younger generations learn by how their elders act, and if it’s acceptable behavior for family members, then it’s how they’ll proceed.

Make a Plan – Just like you wouldn’t fish without a flasher, you should never be caught without a trashbag or three.  Consider them standard issue for anglers everywhere, and make sure to use them.  If you know you’re going to be cooking on the ice, or staying for a period of time, make a plan for how you’ll be handling food scraps and human waste.  Bags and buckets are simple and cheap. 

Re-usable Options – Instead of a plastic grocery bag, haul your food out in a cloth one.  Don’t throw-away 1lb propane cylinders, look to the refillable options.  Small plastic flies around in wind and snow, so repackage your snacks at home without all the wrappers. 

Carry a Chisel So often I see the excuse “it’s frozen in.”  Whether it be by slush or water on the ice, you can chisel out almost anything with some work and determination.  It could be corner blocks for your fish-house, or fabric you tore from a portable shelter, just remember to chisel it out if you brought it on.

Public Shaming – I say this only slightly in jest, as a few choice comments to friends or strangers alike can have a profound impact.  Explore their guilty side by reminding them that their actions are unacceptable in whatever humorous (or non-humorous) way you can.  You don’t have to be angry, combative, or even negative, but it’s all of our duty to make sure we keep this place clean.  When all else fails, pick up their mess and let them know you did it, reminding them that even the neighbor’s dog isn’t allowed to poop on their lawn; at least without some acrimony. 

Influence Policy – This could be at a local or state level to include trash receptacles at landings.  In the past, these options have been difficult due to illegal dumping of trash at these sites, but some of the more popular waters in Minnesota, like Upper Red Lake, have had to find ways to fund a trash facility.  Without it, they’d be swimming in refuse come spring.  Lake associations would do well to try to fundraise for such efforts, though I completely realize the inequity that already exists with local lakeshore owners cleaning up messes, and now funding their prevention of pollution.  

Sadly, my fear is that someday we become prohibited from enjoying that which we consider a common right, simply because the exercising of it creates too big of a mess.        

Photo Courtesy MN DNR.

Photo Courtesy MN DNR.

Photo Courtesy Guy Cunningham.

Photo Courtesy Guy Cunningham.

How to Grip an Ice Rod

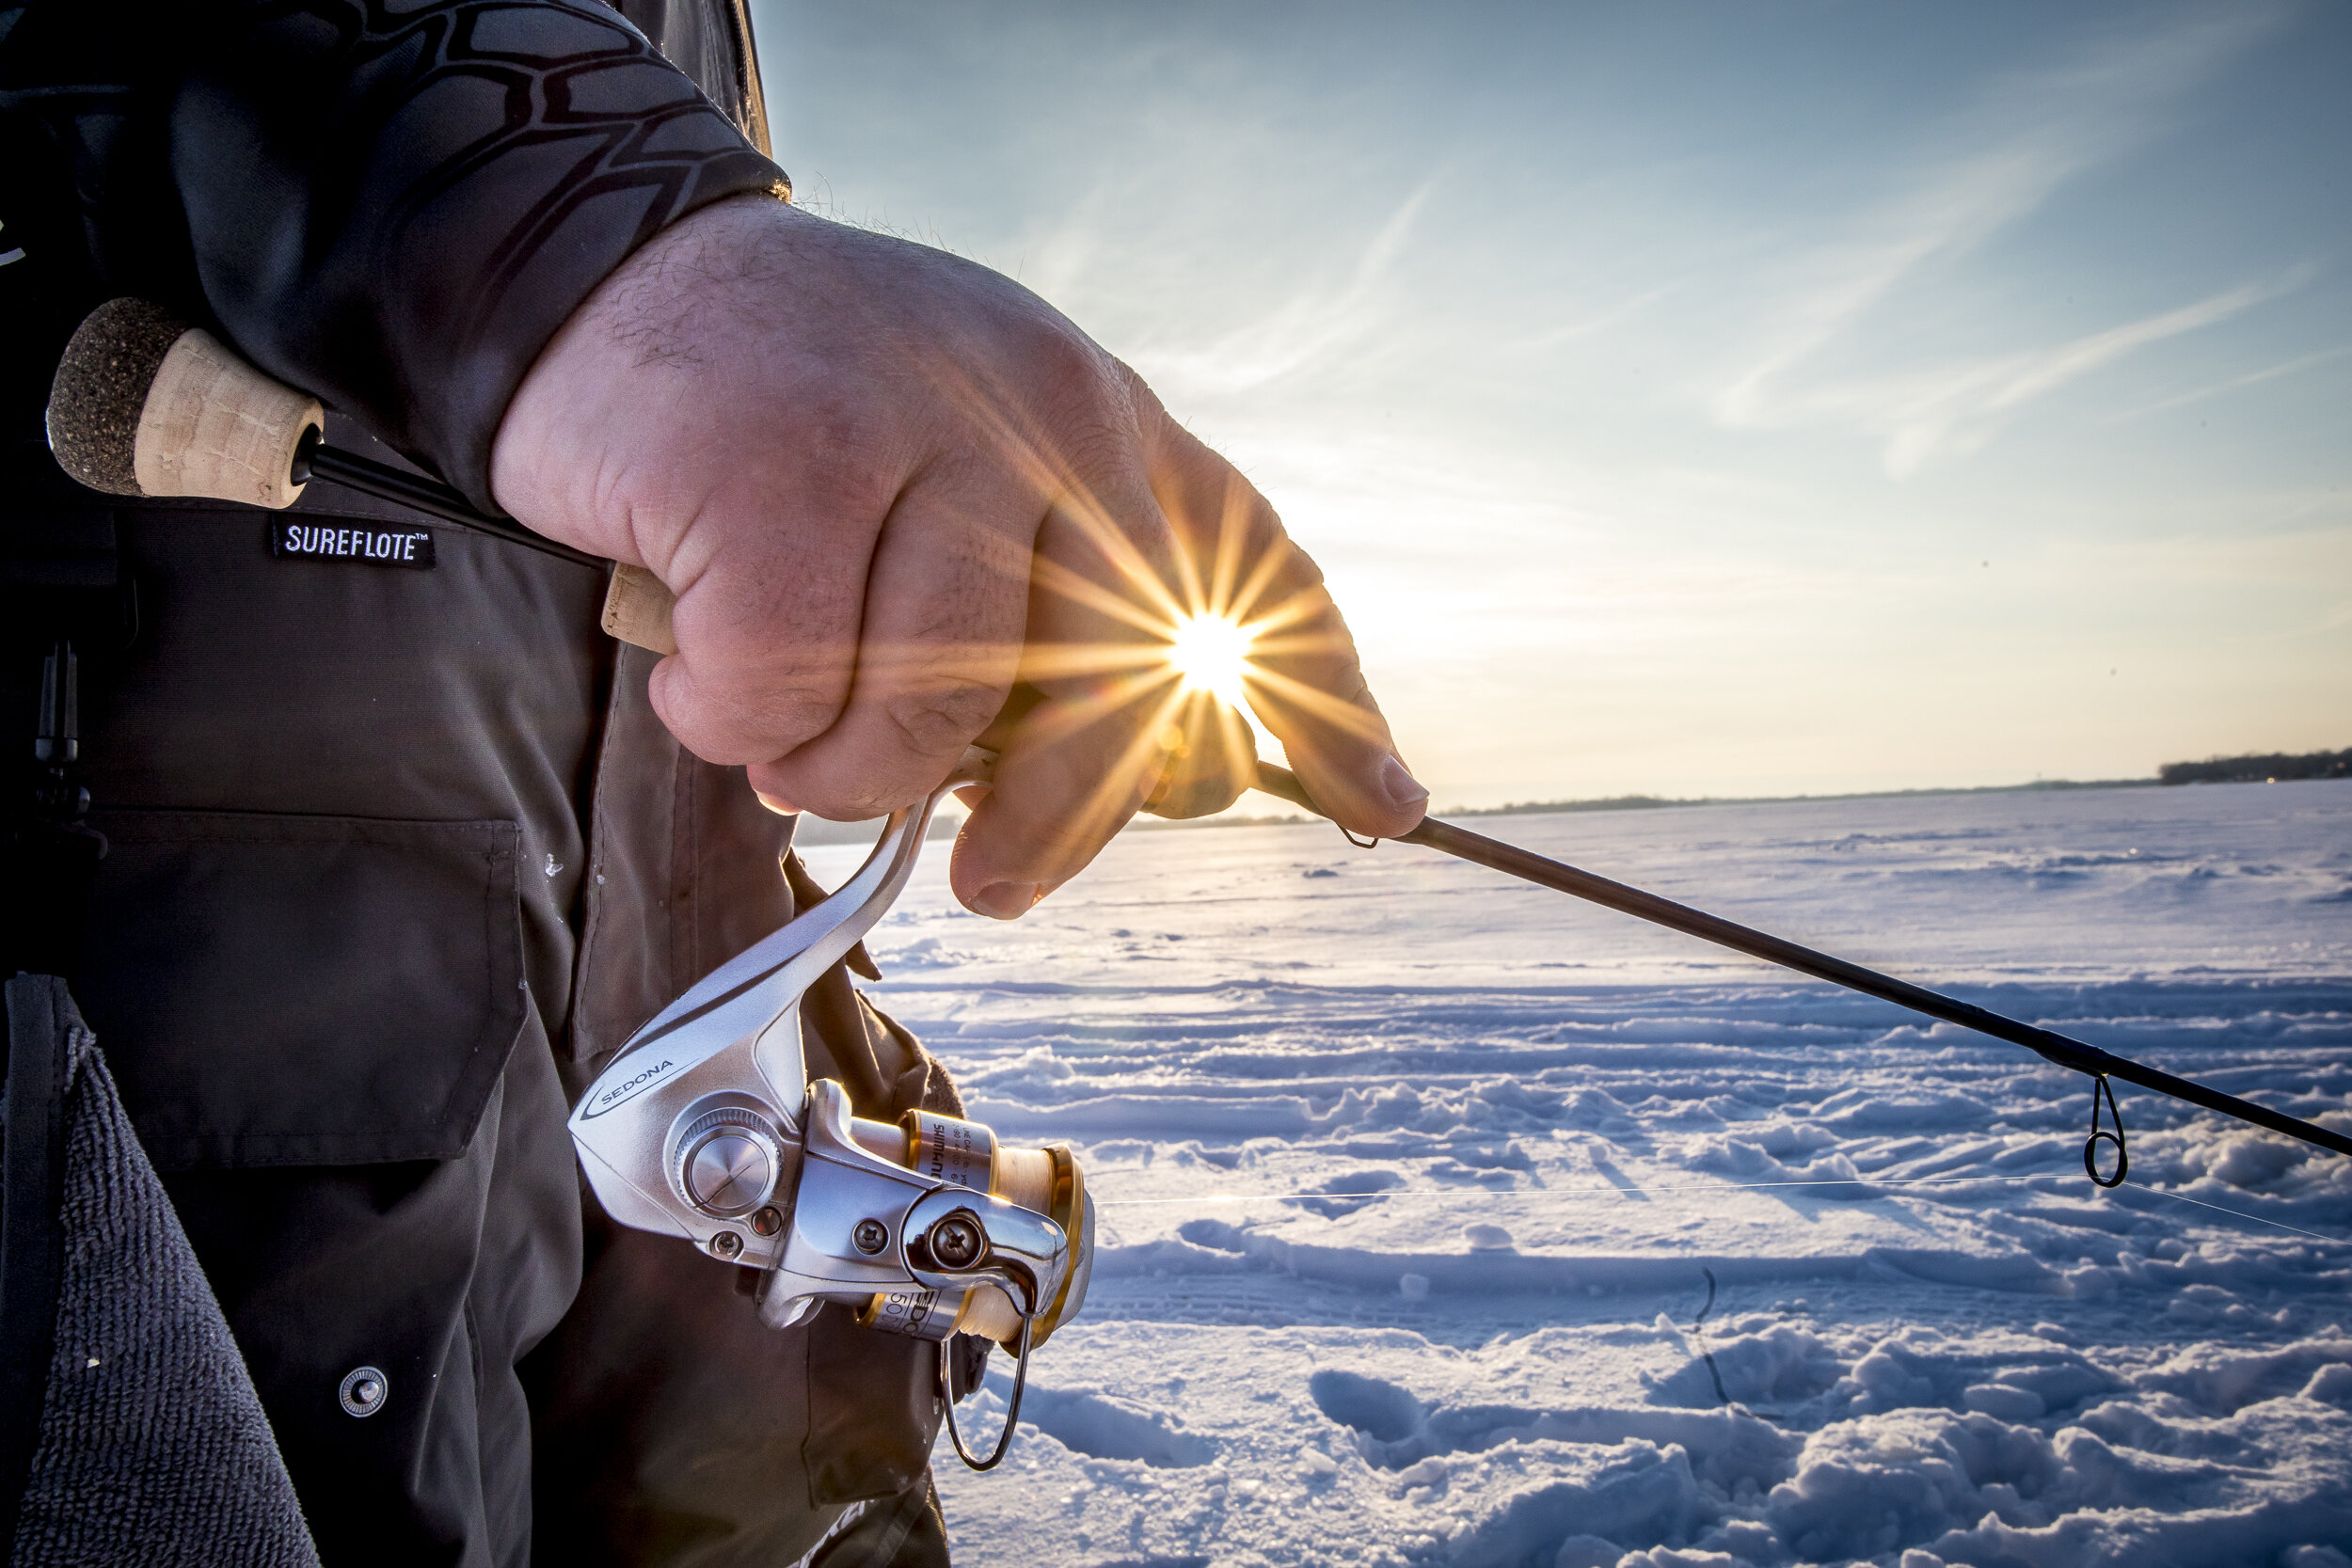
Here’s my preferred grip about 80% of the time.  Photo Credit - Matt Addington Photography

Here’s my preferred grip about 80% of the time.

Photo Credit - Matt Addington Photography

It’s probably nuts to suggest that there’s an improper way to pick up a jigglestick and catch fish, but I’ll stop short of that by saying there’s some methods better than others.  Far be it from me to tell another person how to grip their favorite ice fishing rod, but over the years I’ve found it’s these details that can really translate to additional fish.  I’ll cover a few of them based on rod and reel type, but also explain advantages of one over another.

Pistol Grip

Pistol Grip

Pistol Grip

If you clutch the back of the spinning reel seat between thumb and fore-finger, you may be a pistol-gripper.  For anglers that sight-fish, or otherwise really lean over the hole and closer to your electronics, the “pistol” is a great means of jigging and hooksetting.  Anglers I know that favor this method feel like they have better control of the bait while holding it like they do a pen or pencil.  For them, it translates into finer jigging strokes and ultimate detail work, especially on finicky panfish. 

If your head is leaning forward over the ice hole, then the pistol also aids your hook-setting ability.  Rather than raising your entire arm when its already near your ear, you save wear and tear on the top of your shelter (and rod blanks) by simply flicking your wrist like pointing to the sky.  If you’re a leaner or studier of the graph, this is probably the best grip for you.

Of course it’s not the greatest for reeling, especially if you have long fingers or fat hands.  Big digits get in the way of bringing fish top-side, and at least for this guy, it’s proved cumbersome in fighting especially large fish.  That said, I know some incredible guides and other ice enthusiasts that only grip an ice rod this way.  They’ve outfished me in this manner as many times or more than I’ve outfished them.

Palming

Palming

Palming

This comes into play with the rod-end mounted fly or round multiplier reels.  When I’m using this type of rod and reel, as a righty, my right hand cups the right side of the reel in a form of pistol gripping.  It was a grip of necessity back when I fished more horse-hair, light-poundage line on the much better drag systems offered in those little fly reels.  To keep the arbor from spinning, you needed to palm the reel on hookset while feathering back to allow slip if you drill something big. 

The hookset here is a twist and lift scenario, where you open and extend your hand while lifting the arm.  It’s a quick set once practiced, and I really prefer it anytime a round arbor reel like this is involved.  I don’t prefer this grip with a spinning reel, as unlike the round reels, fingers will be in the way.

Standard Grip – Finger Up

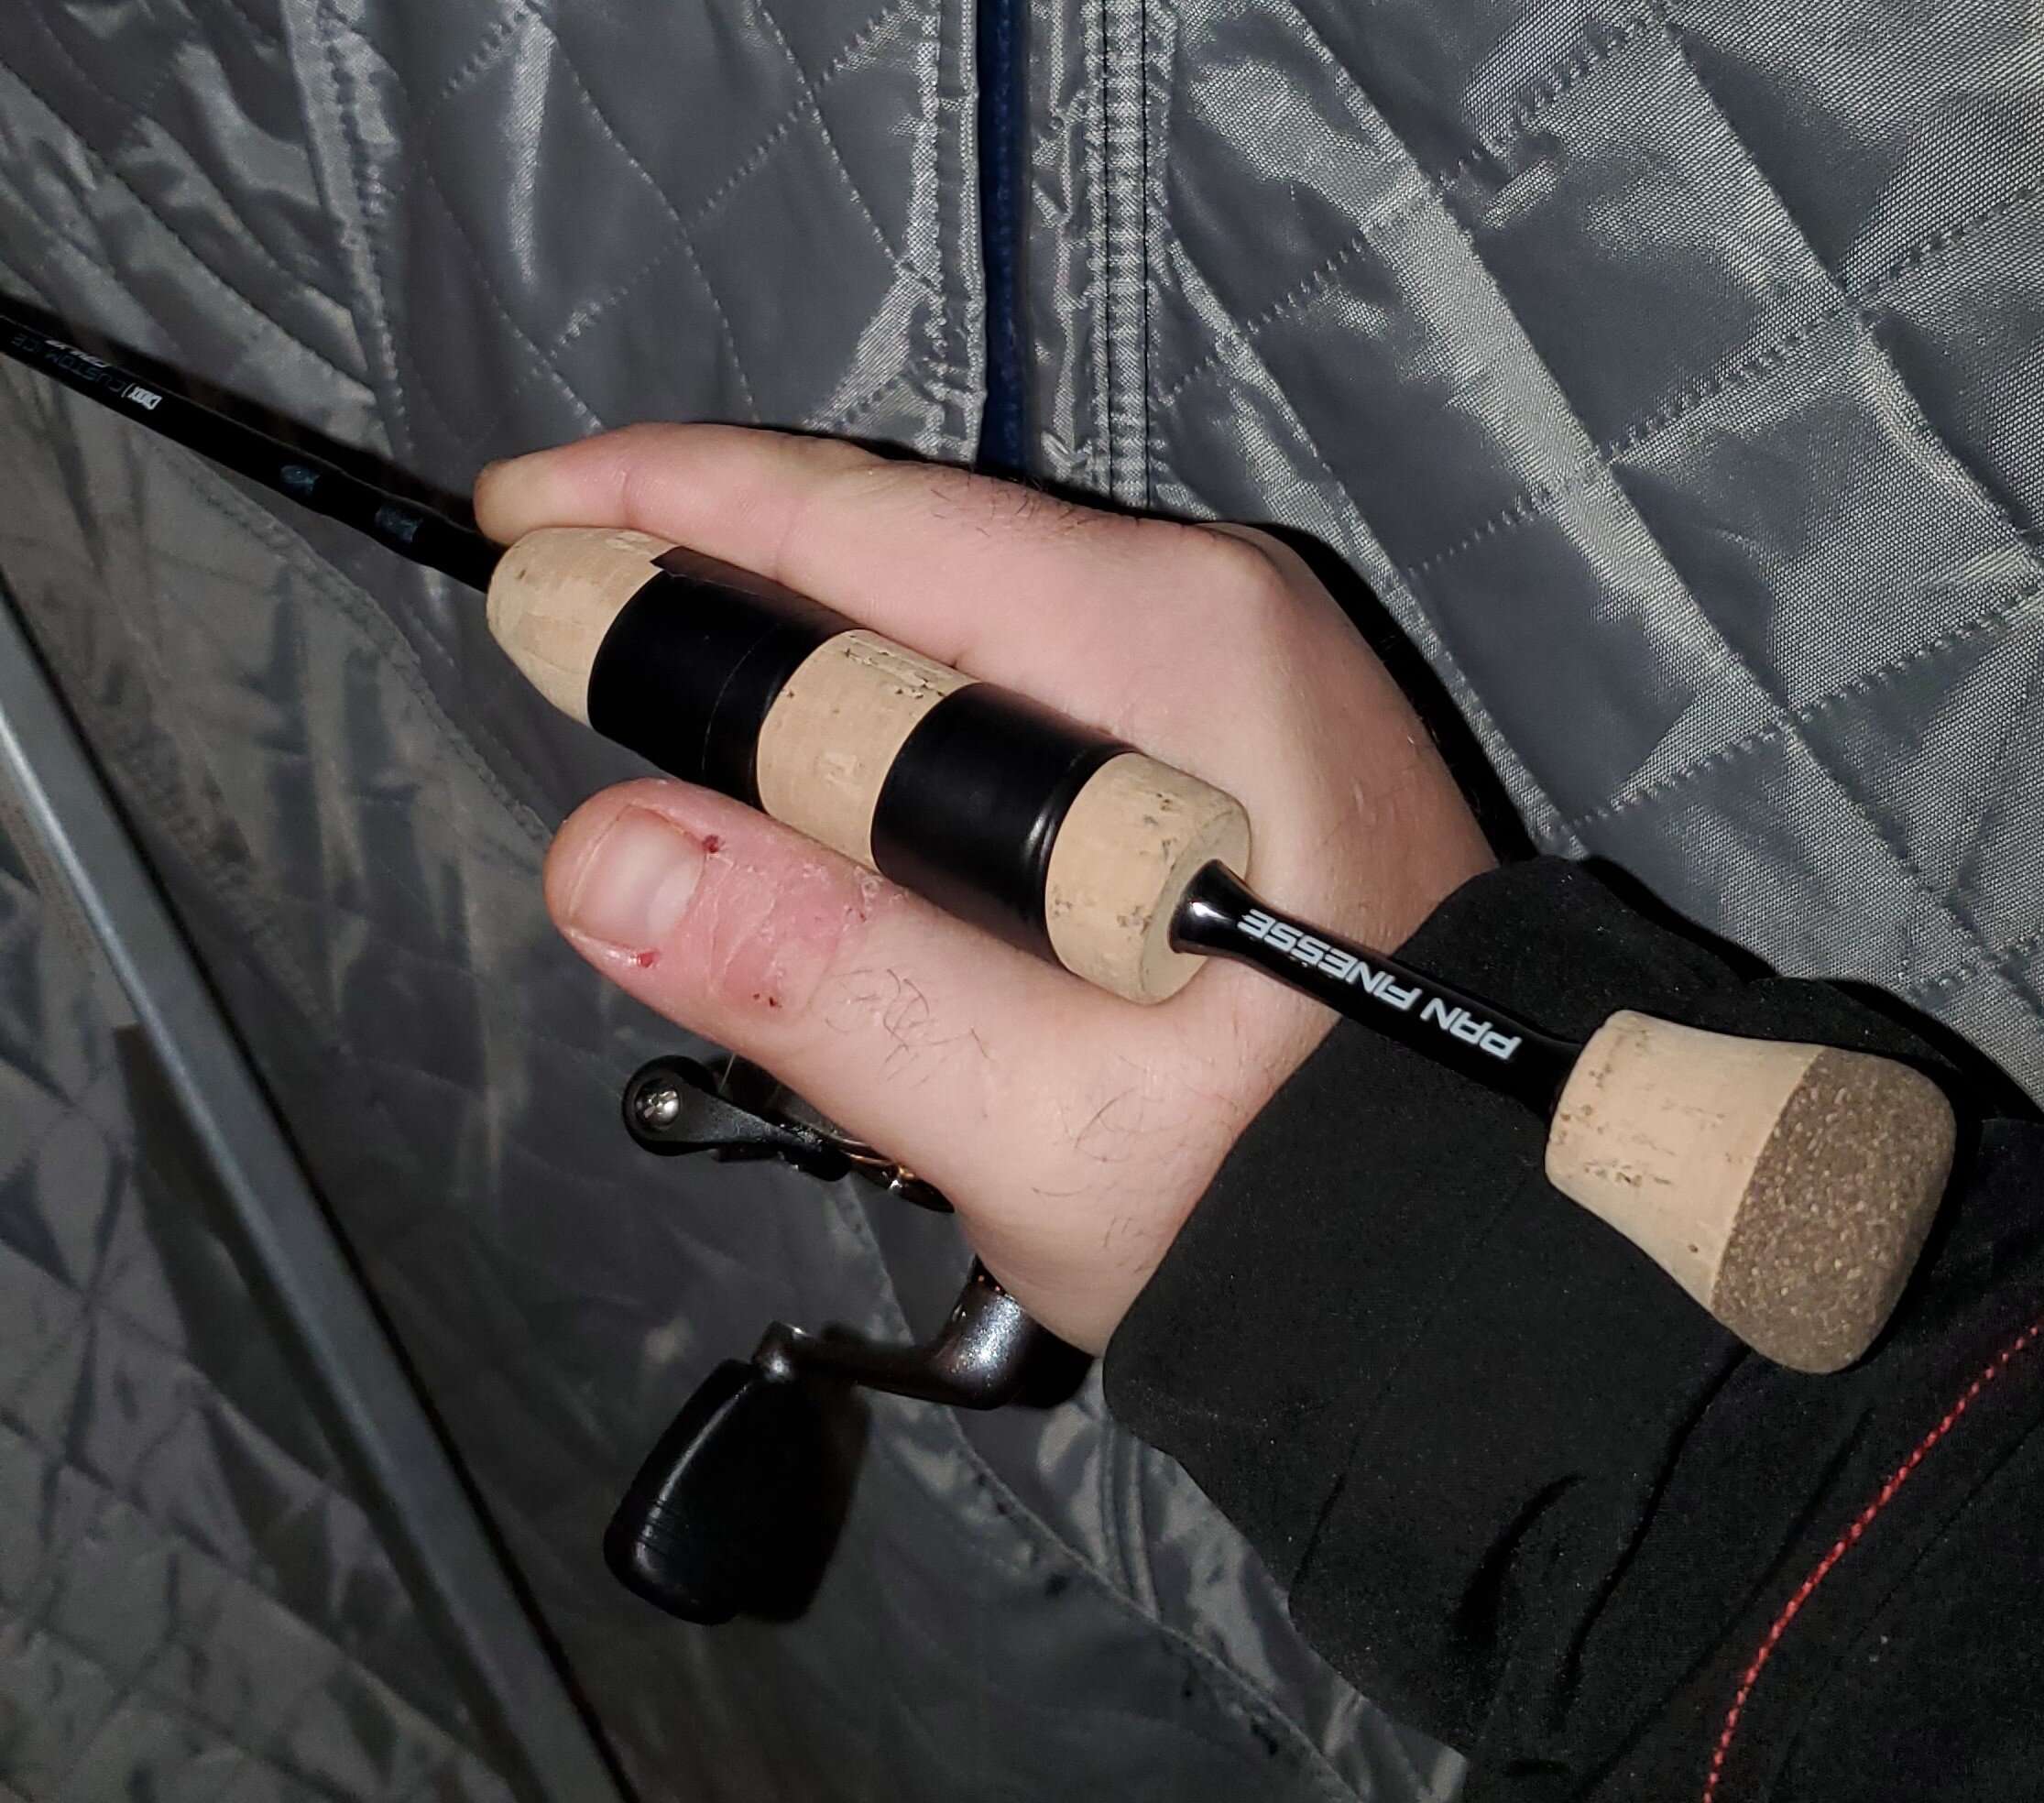
Back when you really had to look to find ice rods with any sensitivity, a finger on the blank was your secret weapon.  Whether paired with a high end custom rod, or whatever you inherited from your grandpa’s 5-gallon bucket of gear, a finger-up offered both better feel and even better jigging strokes.  Today, this is the method I prefer about 80% of the time when not either sight-fishing or using a round reel.  In my mind, it offers comfort and control, while giving you the best flexibility in a fight with big fish. 

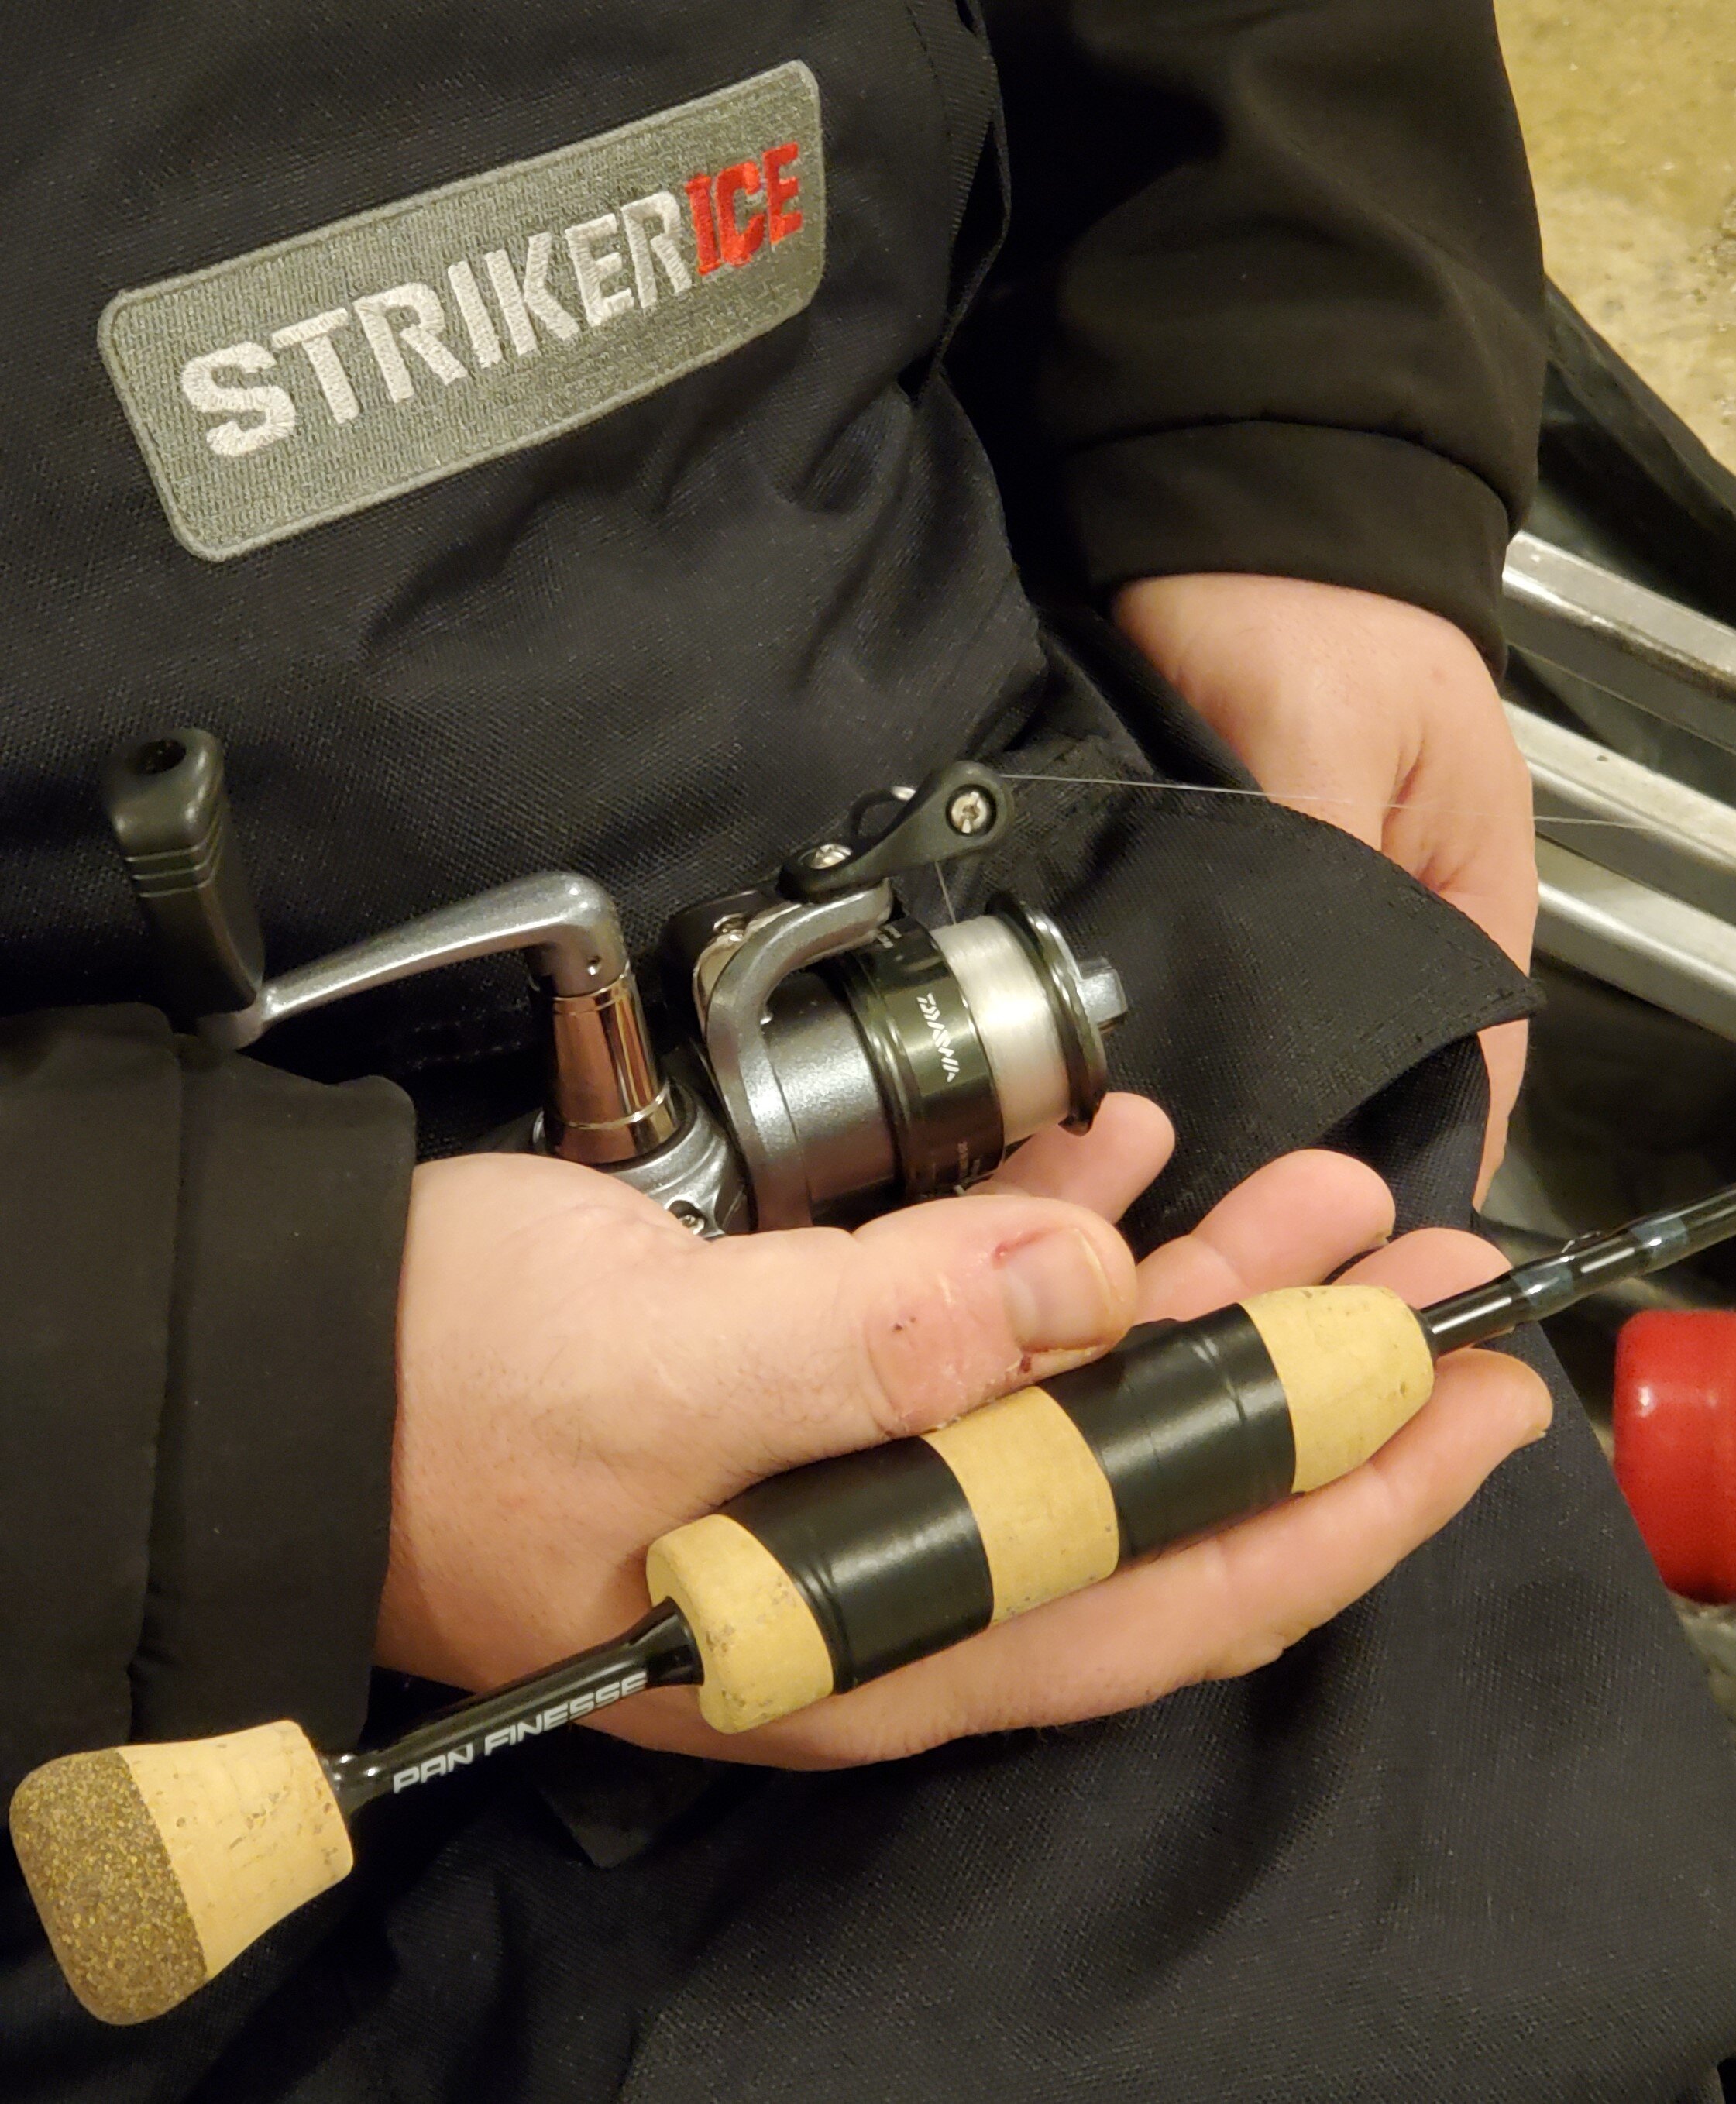
It’s more natural for many people to grip an ice rod this way, but perhaps not with a forefinger up on the blank.  For that reason, the custom ice rods of today that allow you to tape your own reel wherever you’d like, are key to the system.  I tape mine mostly forward, giving me the ability to keep the pad of my pointer finger on blank most of the time.  Normal jigging is unaffected, but subtle finger taps on the blank, as well as squeezes to the rod handle itself allow you to impart some serious subtlety.  If you’ve never done it, try getting into the habit of putting a finger on the blank and see if it doesn’t translate to better bite detection.  Why let the vibration travel through cork when you can get it direct from the blank and make a decision that much faster?

No matter which method you utilize, put some thought into how you go about the business of jigging, bite detection, and hookset.  It might feel wholly unnatural at first, but could make all the difference when the bite is really off.